Chapter 11 Creating and Editing Features
11.1 Purpose
- Learn how to create and edit vector layers
- Learn how to create and modify features
- Practice using the Print Composer to export maps from QGIS
11.2 Tutorial
- Import Long Lake outline, depths
- Style layers (label depths)
- Create layer
- Explain Editing mode
- Create feature/delete feature
- Edit feature
- Style Layers
First, we will add the data required for the map. Using the Add Vector Layer dialog open the Browse file chooser.
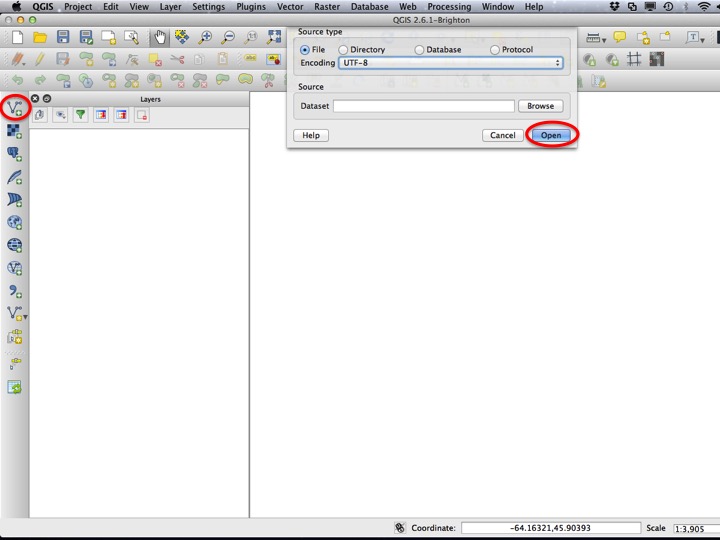
Slide01
Open the long_lake_depths and long_lake_outline layers from the “10 Interpolation Contouring” folder.
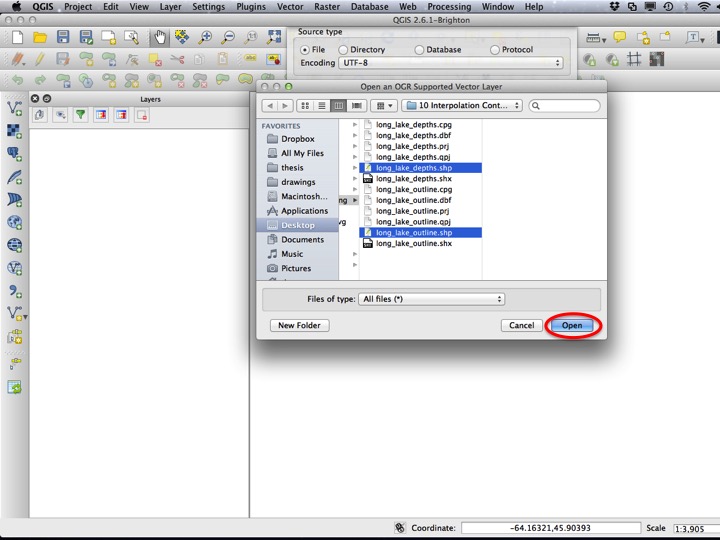
Slide02
We will also add basic labels to each point, which we will need later. You can do this in the Layer Properties dialog; the points should be labeled with the “depth_m” field and have a text buffer of 1 mm. While you’re at it, you should make the water look like water as well.
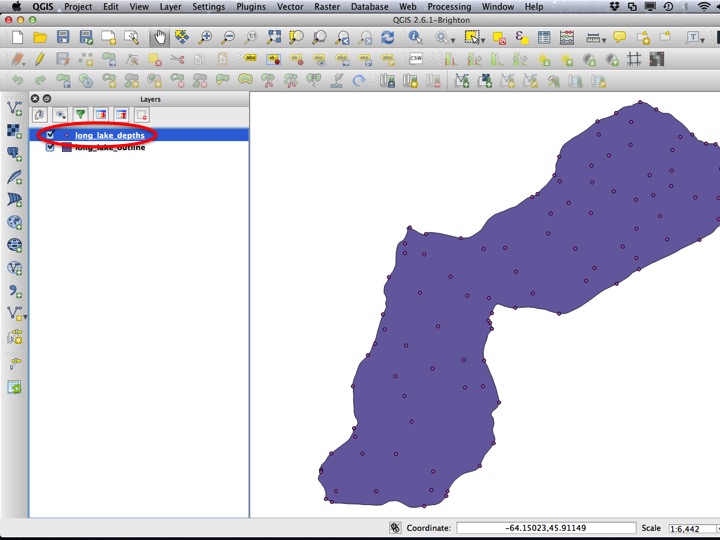
Slide03
11.2.1 Creating a Vector Layer
Once you have the labels sorted, we can add a new vector layer. From the New Layer menu (you’ll have to click the little arrow), choose New Shapefile Layer.
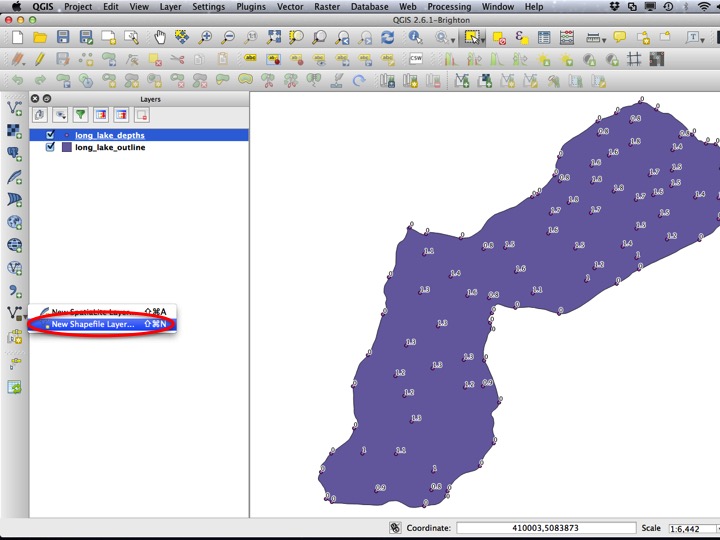
Slide04
This will bring up a dialog where we can specify the options for creating the layer. The first choice we have to make is that of the Layer CRS. This should usually be your project CRS, which in our case is UTM Zone 20.
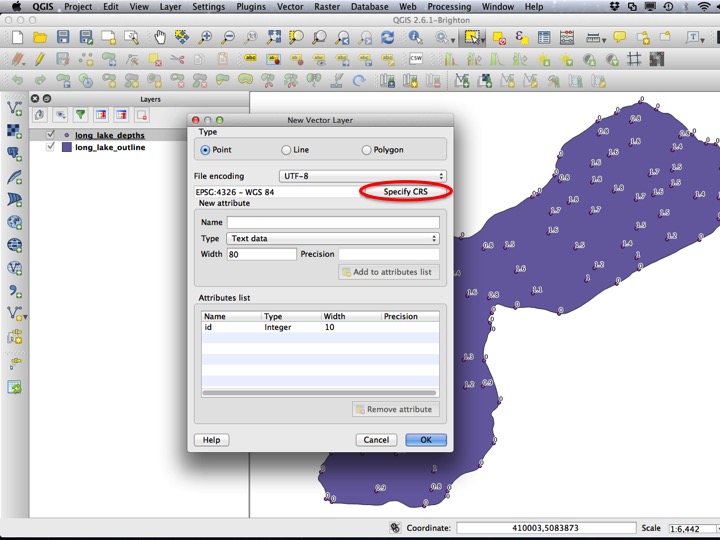
Slide05
After selecting UTM Zone 20 as the Layer CRS, we need to choose if the new layer will be a point, line, or polygon. We will be creating contours, which are line features.
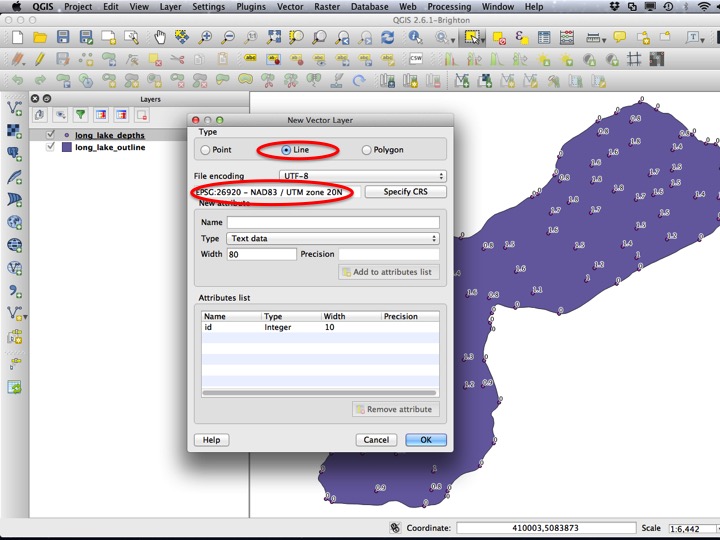
Slide06
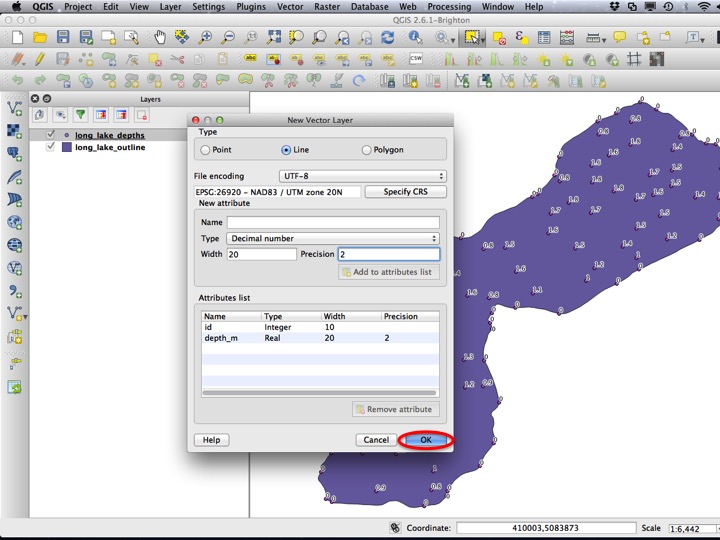
Each depth contour will contain an attribute with the depth that it represents. To store this information in the shapefile, we need to add a field to the Attributes list. The field should be called “depth_m”, be of Type Decimal number, and have a Precision of 2. This means 2 points after the decimal place. Remember to click Add to attributes list!
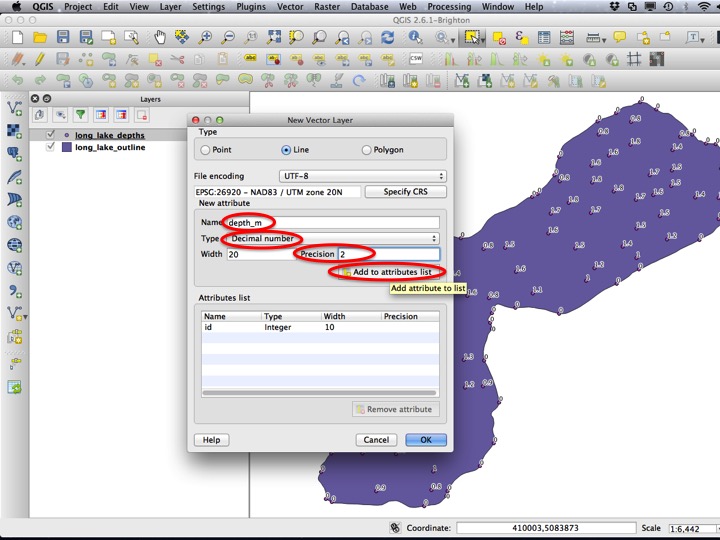
Slide07
Finally, when you’ve made sure you have all the correct options (CRS, point, line, or polygon, and attributes), press OK.
Slide08
QGIS will then prompt you to save he layer. Save the file in the same folder as the data, and call it something like “long lake manual contours”. Click Save.
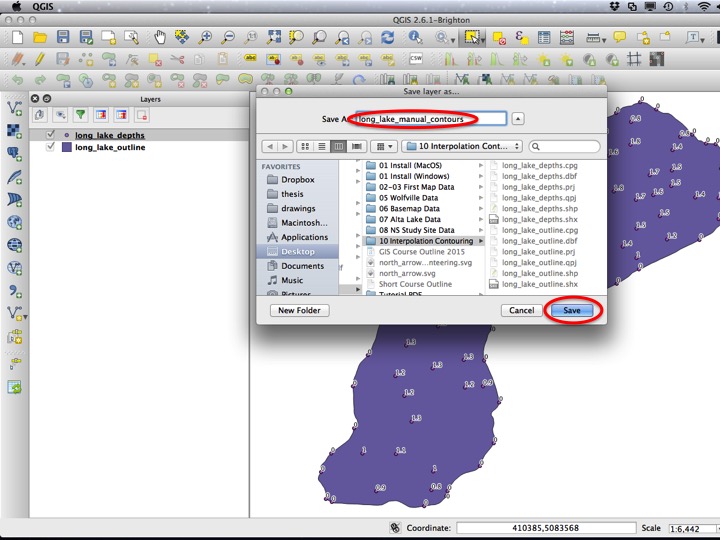
Slide09
11.2.2 Adding and Editing Features
To change the data that underlies a layer, we need to Edit that layer. To do this, you can click the little pencil icon on the Editing toolbar. Whenever you are editing a layer, the changes made to that layer are not saved until you turn editing off (by clicking the pencil icon again when that layer is selected, or by right clicking the layer and selecting Togle Editing). You should only ever be editing one layer at a time, and be careful when you do. Remember that if you change the data that underlies layer it will change in every project that uses that file, not just the one you are in!

Slide10
To add a feature, choose the Add Feature tool. Click on the map to create your feature. Don’t toggle editing or switch tools while creating your feature!. It is not saved until you complete it, and your map will look confusing if you try to toggle editing or change tools while you do this. You can use the arrow keys to move the map extent while you are creating.
Slide11
To finish adding, click on your final point, then right click somewhere else.
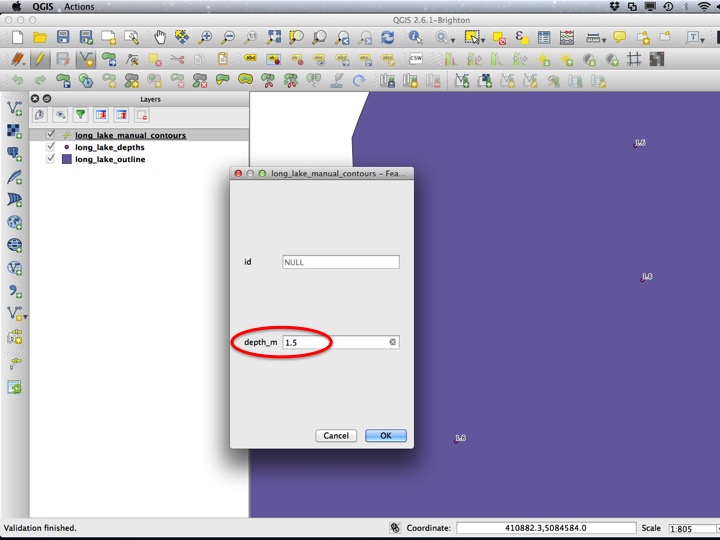
Slide12
You will get a chance to enter your attribute values after you finish adding the feature.
Slide13
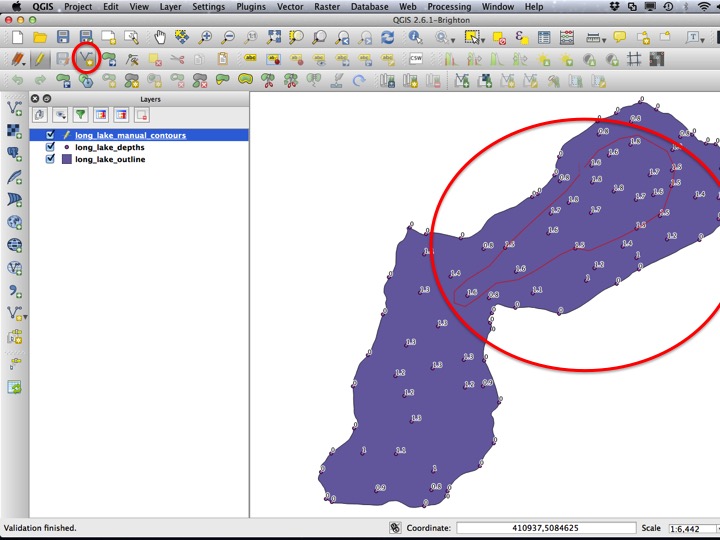
When you have finished adding all of your contour lines (there should be 3…one for 1.5 m, one for 1.0 m, and one for 0.5 m), you will want to save your edits by toggling the editing status or clicking the little save icon next to the pencil.

Slide15
If we open the attribute table for the layer, we should see the attributes we entered when creating the features.
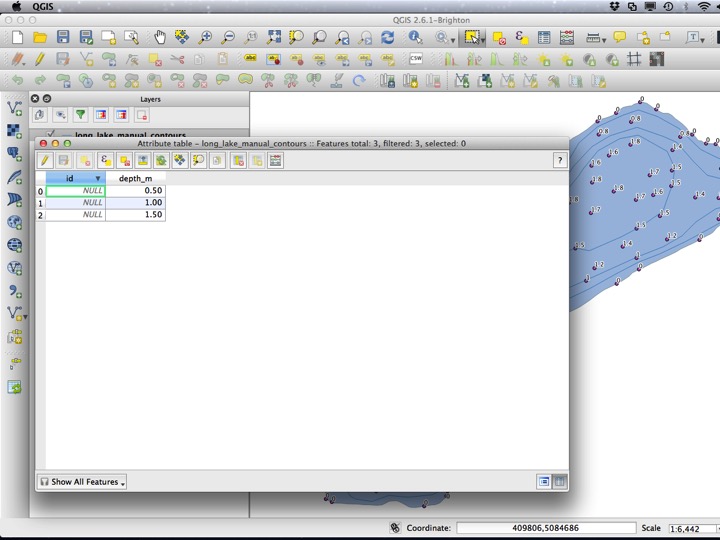
Slide16
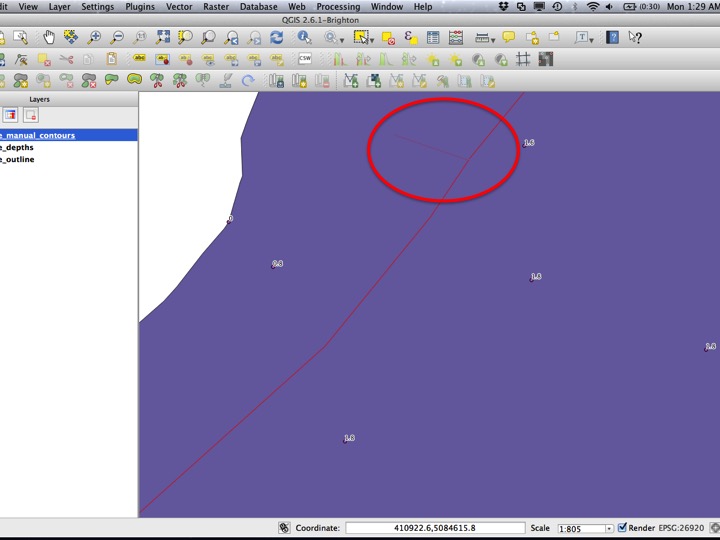
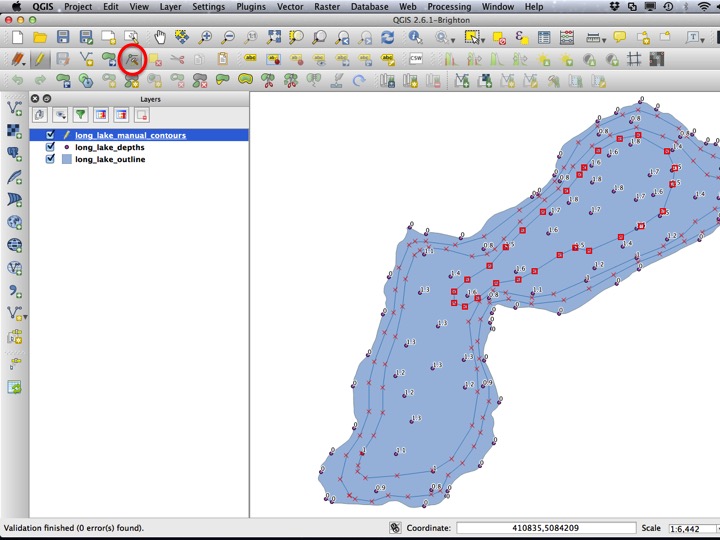
11.2.3 Changing features
Once features are created, they can be modified (actually, any feature can be modified as long as it comes from a shapefile layer and you’ve turned editing on for the layer). We will do this for our contours using the Node tool. Using this tool, you can click on a feature to look at the nodes, double click the feature to add a node at that location, drag the nodes around, and delete nodes (the one you’re about to delete will be blue).
Slide17
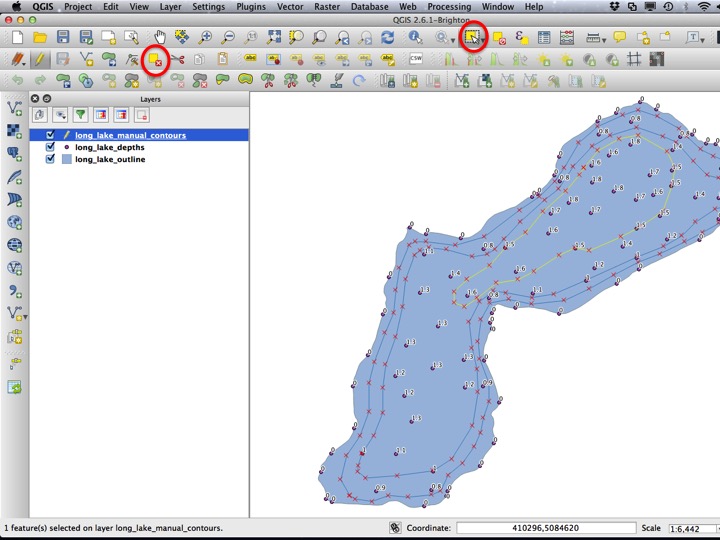
11.2.4 Deleting features
You can also delete features you’re not happy about. You can do this using the Select tool, and then clicking Delete Feature (in new versions of QGIS this is a red trash can).
Slide18
11.3 The Assignment
The assignment for this module is a PDF map that looks like the image below. You will need to create a Print Composer, add a scale bar, add a legend, and add a north arrow. You will also need to add labels to your contours.

The Assignment
11.4 Sequel
Next, we will get a brief introduction to processing in QGIS using the Processing Toolbox. Remember to save your project! You can use the same project for the next module if you would like.